Chrome’s accessibility tree can help developers debug issues and quickly check custom widgets for accessibility.
In this article, we’ll go over
- What the accessibility tree is
- How to access Chrome’s accessibility tree
- Information exposed in the accessibility tree
- Using the accessibility tree to debug examples
- Using the accessibility tree to check custom widgets’ accessibility
- Update: Accessing and navigating Chrome’s Accessibility Tree keyboard tips
I’m using Chrome version 119.0.6045.123.

Rather watch the video? Check out our YouTube video How to use Chrome’s accessibility tree.
If the accessibility tree is intimidating, try using the WAVE extension. WAVE exposes all the ARIA on the page and the accessibility names of interactive elements.
What the accessibility tree is
Before we can get into what the accessibility tree is, we need to cover what the DOM (Document Object Model) is. For the purposes of this article, all you need to know is the DOM is all the webpage data that makes the webpage. You can think of a page’s HTML as a representation of the DOM.

The accessibility tree is based on the web page’s DOM. While the DOM shows all the webpage data, the accessibility tree only shows accessibility data. It filters out any information from the DOM that doesn’t have to do with accessibility.
Important: Assistive technology uses the accessibility tree to interpret the content on the page. So, how the element is displayed in the accessibility tree affects how assistive technology reads it.
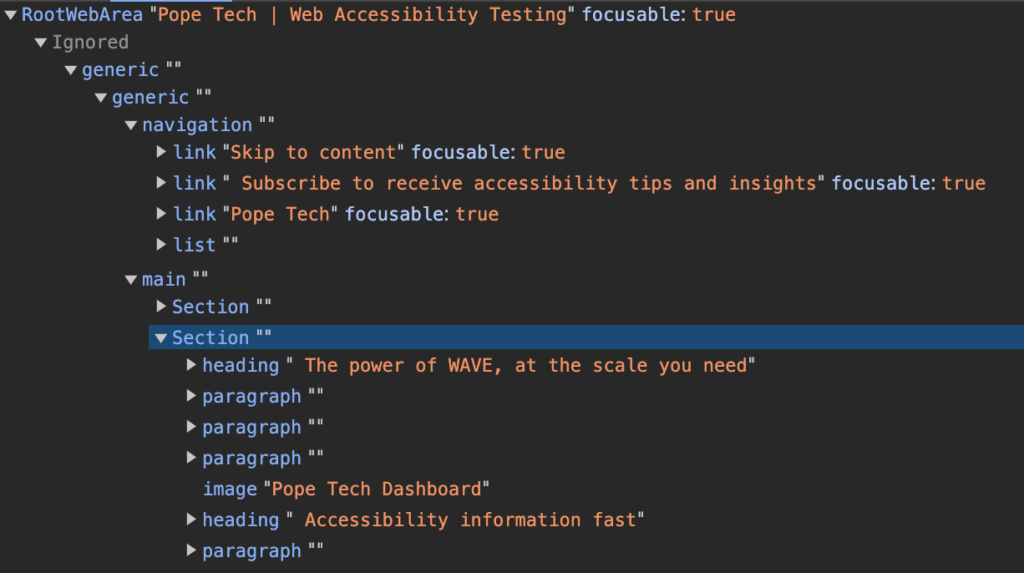
DOM and Accessibility tree example
Here’s an example comparing the DOM with the accessibility tree. The code is for a banner with a link.
In the DOM, the banner starts with a section which translates to a section in the accessibility tree. Back to the DOM, there are two divs with classes. The accessibility tree classifies these as ignored and generic, which means they don’t have any accessibility information.
Lastly in the DOM, we have an H1 and link. In the accessibility tree, the H1 is a heading and the link is a link.

How to access Chrome’s Accessibility pane and Full Accessibility Tree
There are two parts to Chrome’s accessibility tree: the Accessibility pane and the Full Accessibility Tree.
Open Chrome’s Accessibility pane
- Right-click anywhere on the page.
- At the bottom of the menu, select Inspect.
- In the Styles pane, select the More tabs arrow icon. Then, select Accessibility.
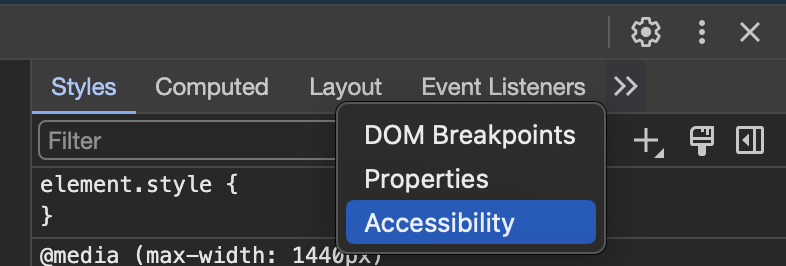
Now the Accessibility pane is open.
Open Chrome’s Full Accessibility Tree
Follow these steps to access the Full Accessibility Tree in Chrome (I’m using version 119.0.6045.123):
- Right-click anywhere on the page.
- At the bottom of the menu, select Inspect.
- In the Elements pane, select the Switch to Accessibility Tree view icon. Select it again to go back to the DOM tree view.

Now the Full Accessibility Tree is open.
If you don’t see the Switch to Accessibility Tree view icon, then in the Accessibility pane under the Accessibility Tree drop-down, select Enable full-page accessibility tree. Then select Reload DevTools in the pop-up.

Information exposed in the accessibility tree
Full Accessibility Tree information
When you access the Full Accessibility Tree in the elements pane, you get all the parent and child relationship information.
As you switch between the DOM tree view and the accessibility tree, the same element stays selected. This helps you understand how the accessibility tree interprets the DOM tree view.
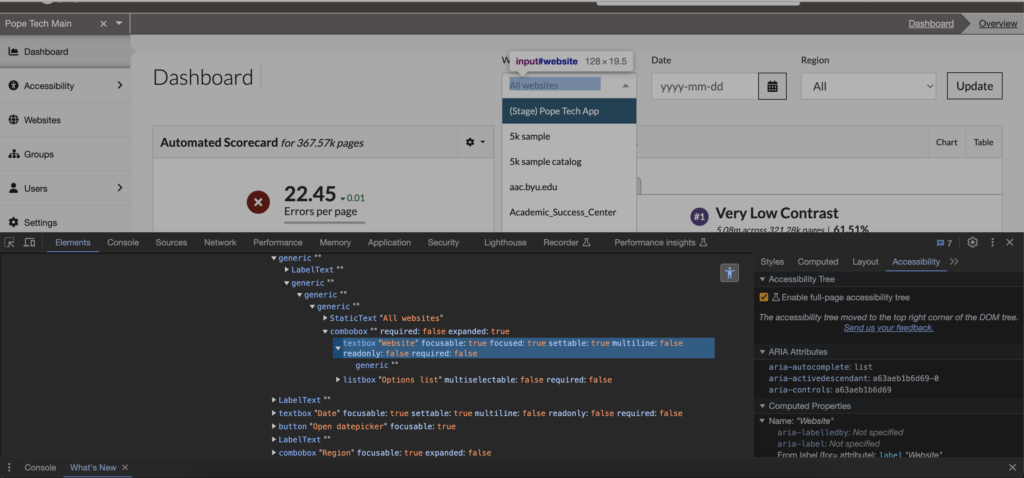
Accessibility pane information
The Accessibility pane has an ARIA attributes and computed properties dropdown.
ARIA Attributes dropdown
ARIA attributes lists all the ARIA attributes attached to the selected HTML element.
For example, in the DOM, this field input has the attributes ARIA autocomplete, active descendant, and controls. In the Accessibility pane, there are the same ARIA attributes listed with their values.

Computed properties dropdown
Computed properties tell you how assistive technology will interpret the DOM. Most elements have a name and role listed here. They’ll have additional properties depending on the element.
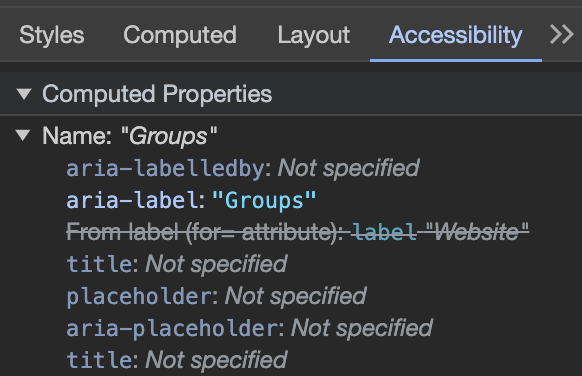
The first property is the name, which is the accessible name. This is the name assistive technologies use for the element. For this field input, the name is Website. Under the name are all the attributes that could affect the accessible name. Going through the list, I get that the name comes from the HTML label.
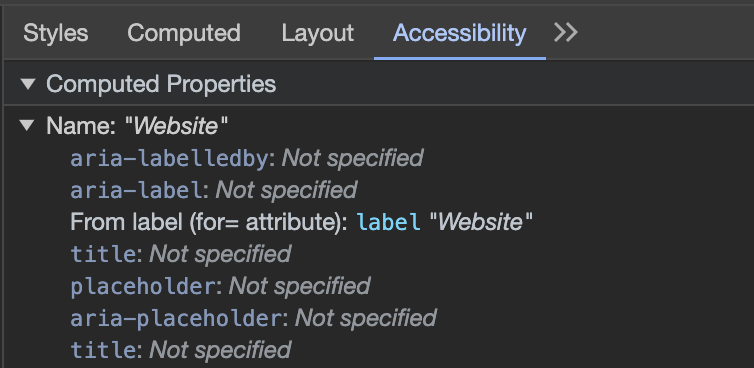
If I added an aria-label that equals Groups, the accessible name changes to Groups because aria-label trumps the HTML label. That means assistive technology would refer to this element as Groups now instead of Website.
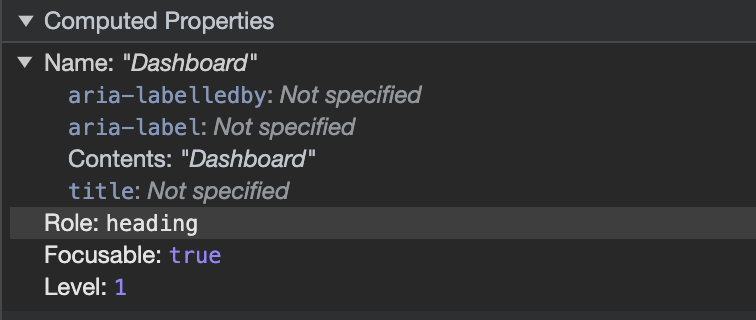
The role is the type of object that element is. For example, this H1’s role is heading. Because it’s a heading, it has another property called Level, which is 1 since it’s a heading 1.
Using the accessibility tree to debug examples
One way to use the accessibility tree is for debugging issues.
Example 1
Here’s an example. Let’s say this image of the Pope Tech dashboard has alternative text in the alt attribute. The alt text should be announced by a screen reader, but it isn’t. I’ll use the accessibility tree and pane to figure out why.
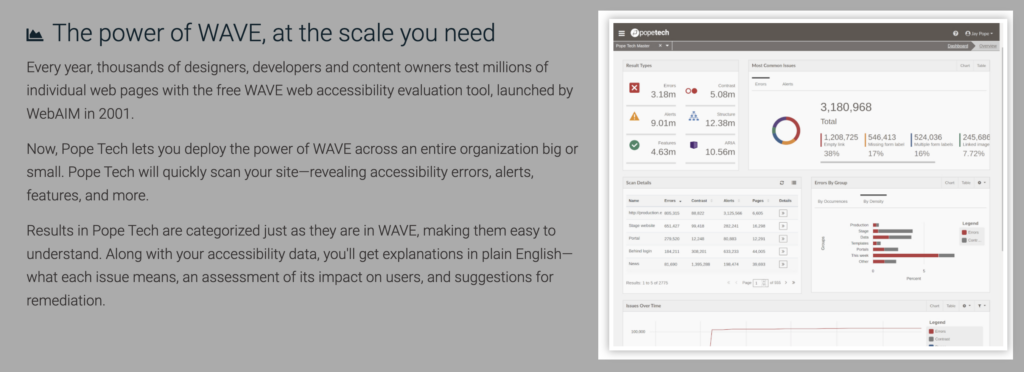
The image is “ignored” in the full accessibility tree. In the Accessibility pane, it has an aria-hidden attribute. In the computed properties, it says, “Accessibility node not exposed” and “Element is aria-hidden.”

The image has aria-hidden=”true”, which means the accessibility tree ignores it. I need to get rid of the aria-hidden attribute on the image. Once I remove the aria-hidden attribute, the image is exposed to the accessibility tree. Its name is the alt text – “Pope Tech Dashboard.” Now, the screen reader announces the image’s name.

Example 2
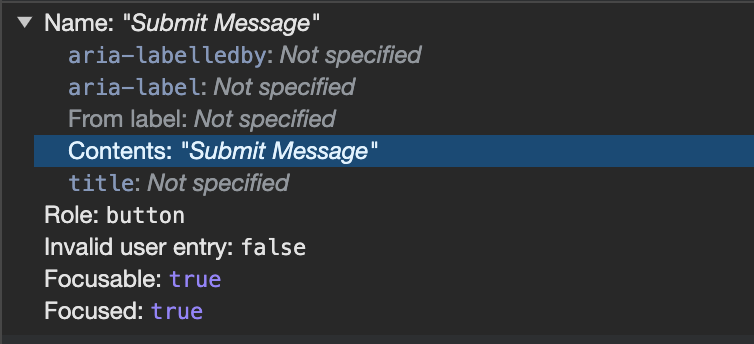
When a screen reader announces this submit button, it says “Pope Tech.” It should say the button text, which is “Submit Message.” I’ll use the accessibility pane to understand what the problem is.

In the Accessibility pane under the Name dropdown, there’s a list of all the attributes and content related to the button element. The Content is “Submit Message” but it’s crossed out. Instead, the aria-labeledby is what’s defining the accessible name.

The aria-labeledby isn’t needed. To fix the accessible name, I’ll remove the aria-labeledby attribute. Now, the accessible name pulls from the button content and is “Submit Message”.
Using the accessibility tree to check custom widgets’ accessibility
Another way to use the accessibility tree and pane is to check custom widget’s accessibility.
W3C has ARIA patterns for building accessible widgets. The patterns are for interactive website components like accordions, combo boxes, and feeds to name a few. These patterns use ARIA to make the interaction accessible.
The accessibility tree and pane expose the parent and children relationships and all the ARIA used making it easier to check the widget.
This means you can have the pattern suggestions pulled up while easily checking each of the widget’s elements with the accessibility tree and pane.
For example, some of the combo box pattern suggestions are:
- Setting the combobox element role to combobox
- On the element with role=combobox, have aria-expanded set to false when the pop-up is not visible and true when it is
I can quickly check the combobox element has these by opening the accessibility tree and pane.

Update: Accessing and navigating Chrome’s Accessibility Tree keyboard tips
We had a customer reach out asking for navigation tips when using a screen reader. We researched some options and found keyboard shortcuts that give an alternate way to access and navigate the Chrome Accessibility Tree. These are helpful for keyboard and screen reader users.
Open the Elements Pane and access the Accessibility Tree View
Chrome has keyboard shortcuts that make it easier to navigate the inspect tool. Using these, here’s a way to open and navigate the inspect tool to use the accessibility tree.
- Select Command/Control + Shift + C to open the Inspect Elements pane.
- Select Shift + Tab to go up the Elements pane until you reach the Switch to Accessibility Tree View button.
- Select Enter to toggle to the Accessibility Tree view.
- Use the arrow keys to review the Accessibility Tree for that page.
Access the Accessibility Pane for a specific element
- Open the Elements pane with Command/Control + Shift + C.
- Use Shift + Tab until you get to the HTML for the page in the Elements Pane.
- Use the arrow keys to find the specific element. (You don’t have to select it – just navigate to it with the arrow keys).
- Tab to the Styles tab. This is a tab group where you can access other panes.
- Use the right arrow or navigate into the tab group with your screen reader to get to the More Tabs dropdown button.
- When testing with Mac Voiceover, it took me straight to the More Tabs button skipping over the tab group. This is where you want to be.
- Select Accessibility from the More Tabs dropdown.
Now you have the Accessibility Pane open, and it will have accessibility information for the element you navigated to. To get information for a different element, go back to the Elements pane, navigate to another element, and then tab back down to the Accessibility Pane. The Accessibility Pane should stay open, so you don’t have to re-open it.
F12 opens and closes the Inspect pane. It will put you at the top of the pane, so you’d need to reselect the element.
Windows users
Windows users can open the Elements Pane right on the element they are focused on. This removes having to search for the element in the HTML.
- Focus on the element.
- Select Shift + F10 then select N to open the Elements pane focused on that element.
- Navigate to the Accessibility Pane (using the steps above) to review that element’s accessibility information.
Learn more about accessibility tools to use in your processes: WAVE and other accessibility tools.
