Quick summary
WAVE is an extension you can install on Chrome, Firefox, or Edge.
The WAVE extension gives everyone a free and secure way to check most web content for accessibility. It can also help with manual testing.
In this article, you’ll learn:
Install the WAVE extension
WAVE is a free and secure extension you can install on Chrome, Firefox, or Edge. It’s a suite of accessibility testing tools that help you find accessibility issues.
To start using the WAVE extension, you’ll first have to install it. To install the extension, visit WebAIM’s WAVE browser extension webpage and choose the browser you’ll be using. From there, install the extension.
Activate the WAVE extension
Once the extension is installed, you’re ready to use it on a webpage. To activate the WAVE extension, follow these steps:
- Navigate to the page you want to test.
- Select the WAVE extension icon in the top right of your browser.

- If you don’t see the extension, try opening your browser’s extension menu and pinning the WAVE extension to your browser bar.
The WAVE extension has five tabs you’ll use. We’ll go through how to use each of them.
Details tab
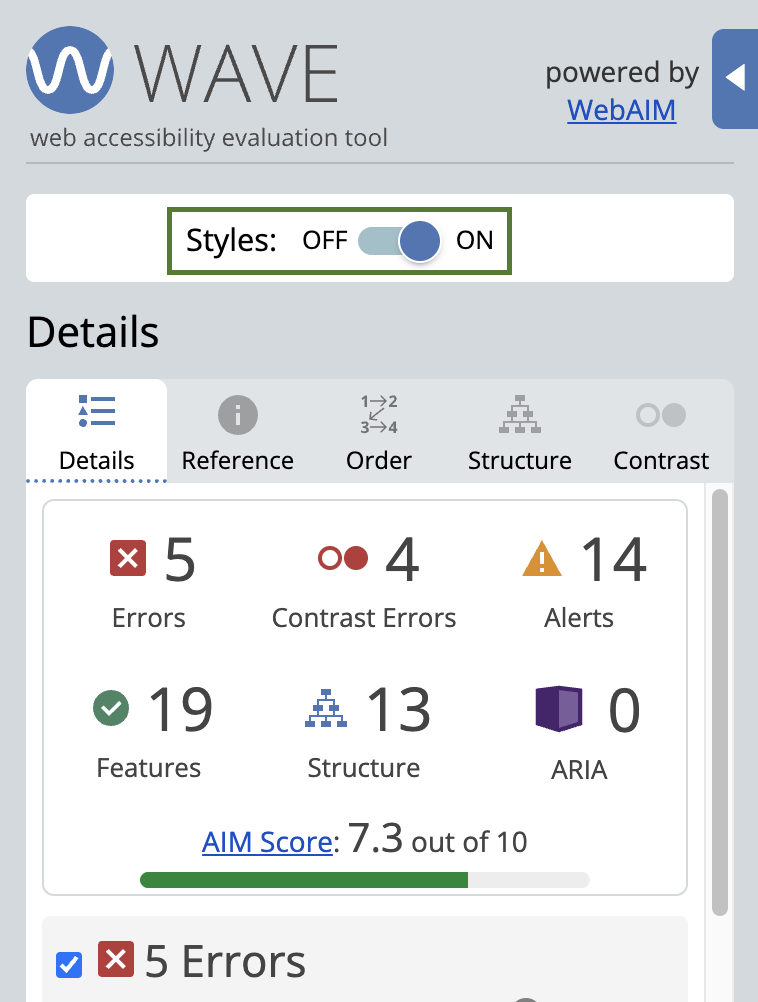
The Details tab lists all the accessibility results for errors, contrast errors, alerts, structure, features, and ARIA.
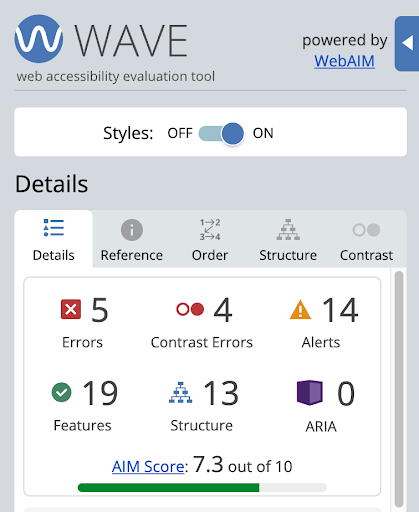
Here’s what each accessibility result means:
- Errors – Accessibility errors that should be prioritized and fixed.
- Contrast – Specific types of accessibility errors related to color contrast. These should also be prioritized and fixed.
- Alerts – These could be accessibility issues. They should be checked to see if they are or not.
- Structure – Identifies any structural HTML like regions, headings, and lists. Structure plays an important role in accessibility, so review structural elements to see if any cause accessibility issues.
- Features – Elements of your website that probably improve accessibility. They should still be checked to make sure they’re implemented correctly.
- ARIA – ARIA, or Accessible Rich Internet Applications, refers to ARIA HTML that is used to make the page structure more accessible. Not all HTML elements have accessibility built into them, so ARIA is used to add accessibility. Most ARIA items require a manual review to see if they’re used properly.
The automated AIM score appears at the top of the Details tab under the Summary elements.
It compares your page’s error density to the top million sites:
- 0/10 = worse than average
- 5/10 = average
- 10/10 = better than average
A complete AIM Score includes a manual score too, but the automated score alone is useful for understanding current status and improvements over time.
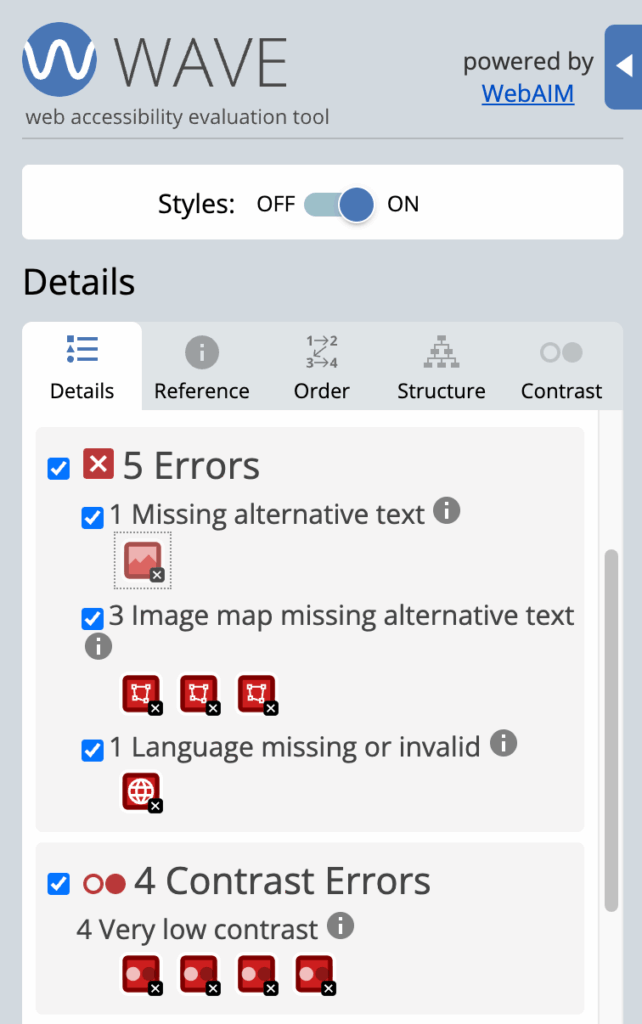
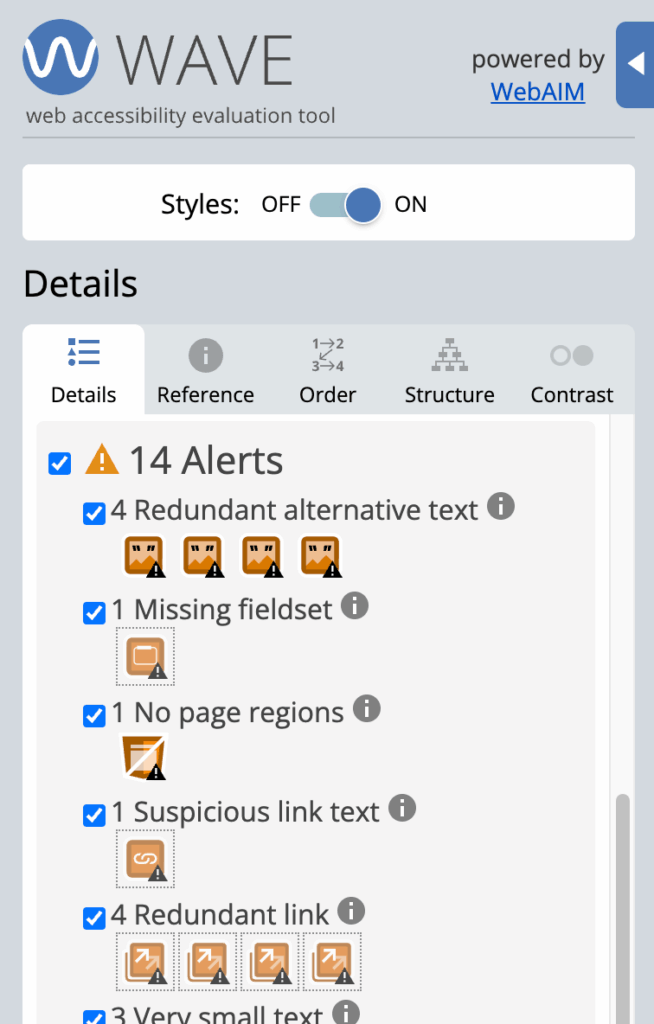
Below the AIM Score, it lists all the accessibility results for errors, contrast errors, alerts, structure, features, and ARIA.

How you can use the Details tab
You’ll probably use the Details tab the most when using the WAVE extension. It’ll be how you get more information and review each accessibility result.
Follow these steps and tips to interact with the Details tab:
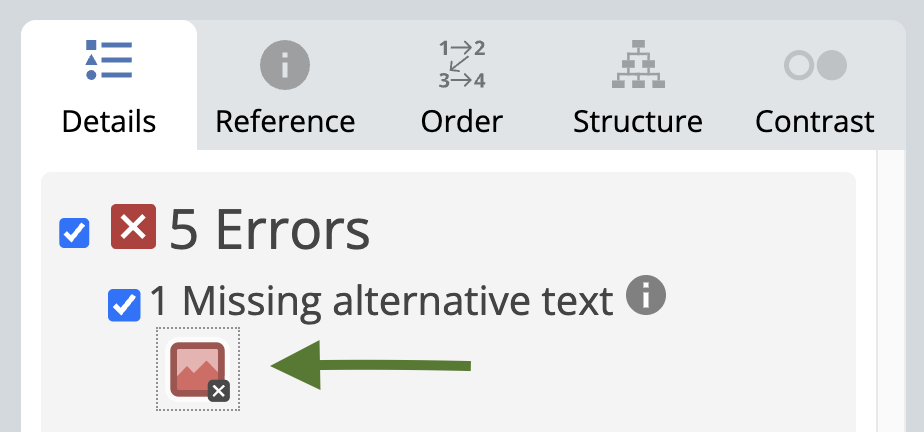
- Select the checkmark next to any of the accessibility results to hide it on the webpage. This will declutter the page if you’re trying to focus on something specific.
- Select an accessibility result icon. When you select an icon, the webpage will scroll to where that result is on the webpage.
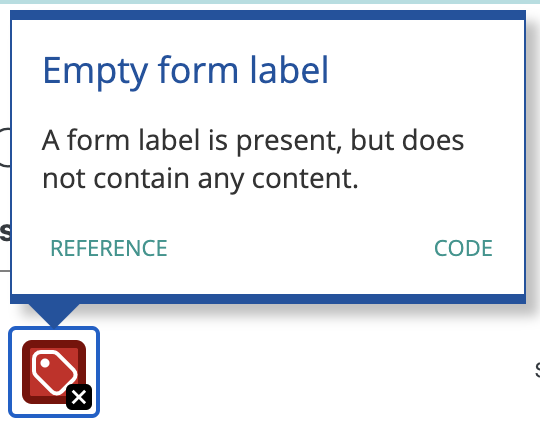
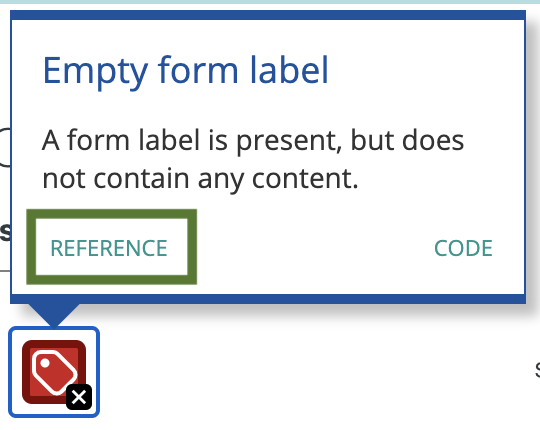
- Select the result icon on the webpage to get a popup that will briefly explain the result and give you links to access the reference information or look at the HTML code.
- If the icon in the WAVE panel is greyed out with a dashed border, it isn’t visible on the webpage. To review it, turn Styles off. This will turn off all the CSS styling and can simplify the page view.
Reference tab
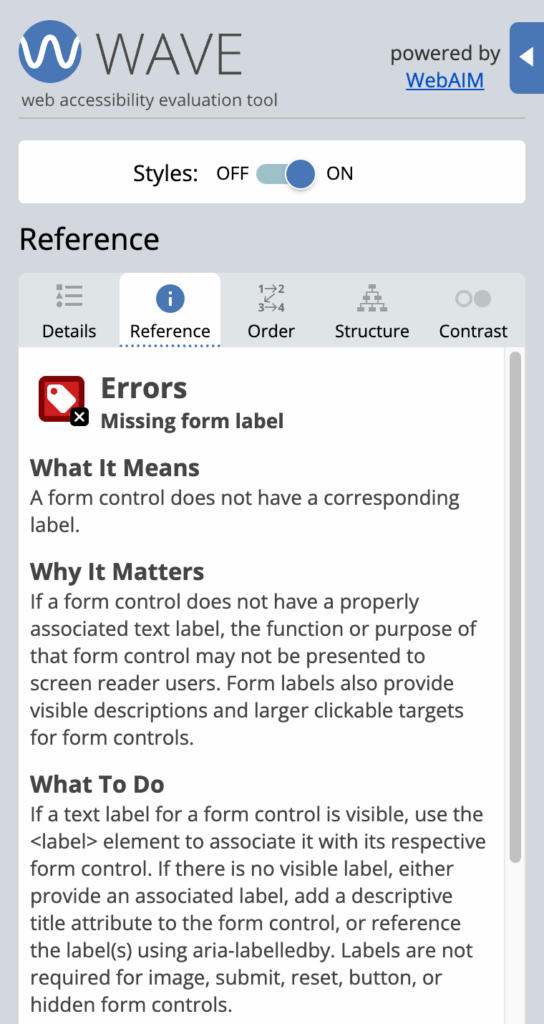
The Reference tab has additional information about accessibility results. It includes:
- What the result means
- Why the result matters
- What to do to fix or review the result
- How the WAVE algorithm found the result
- Related WCAG standards and guidelines
How you can use the Reference tab
You’ll use the Reference tab to learn about the different results your website has. If you have a question, this tab is a great place to start.
There are two ways to see an accessibility result’s reference information:
- The first way is to select the information icon in the Details tab.

- The second way is to select the result icon on your webpage. In the popup, select Reference.
Order tab
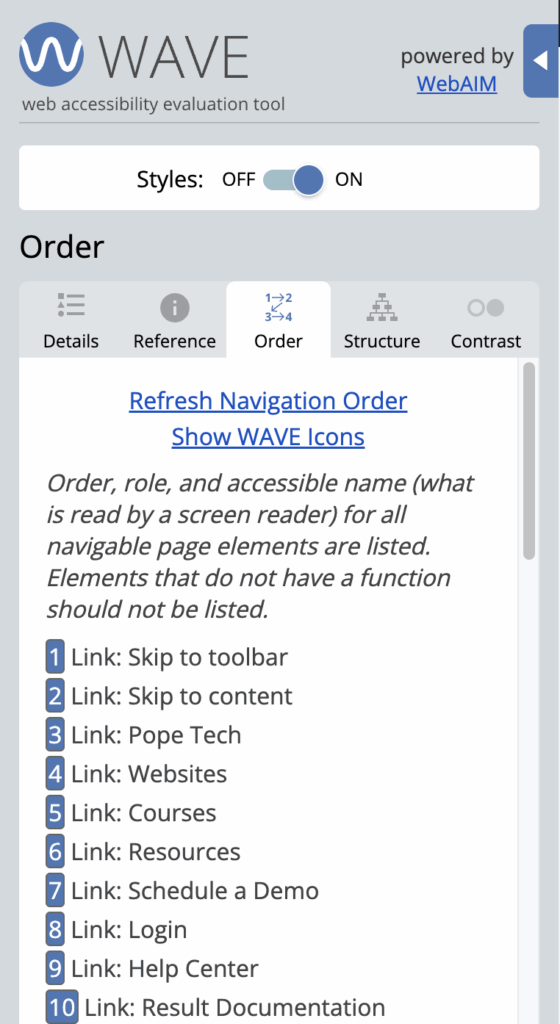
The Order tab is a great tool to check your web page’s tab order. The tab order is the navigation order you go in when using the tab key to navigate the page. By default, interactive elements like links or buttons make up the tab order.
When you go to the Order tab, there’s a numbered list, which represents the tab order. Each list item has the function and accessible name (what is read by a screen reader) for all navigable elements on the page.
WAVE also removes the accessibility result icons from the web page while you’re on this tab. They are replaced with number icons, which also represent the tab order.
How you can use the Order tab
You’ll use the Order tab to make sure your page’s tab/navigation order makes sense and to check the accessible name of all the navigable elements.
Here’s what to review the order list for:
- The tab order is logical. For example, it starts at the top and goes down the page in a logical order.
- If you turn Styles off, the tab order will refresh, so you can test how CSS is affecting the order.
- Elements that aren’t interactive. Any elements that are NOT interactive (button, link, or form input) should be removed from the tab order.
- The accessible name for each element makes sense. The accessible name is read aloud by screen readers, so what’s listed here is read by the screen reader.
- After adjusting form inputs, select Refresh Navigation Order to test how this changes the accessible name.
Structure tab

The Structure tab is basically a table of contents for your web page. It shows you the landmark elements like <header>, <nav>, <aside>, <main>, and <footer> plus all the headers on the page. Assistive technology users rely on a clear structure to navigate web pages. And, this tab helps you quickly check your structure. Learn more about headings accessibility in our article, 5 heading accessibility issues and how to fix them.
How you can use the Structure tab
You’ll use the Structure tab to make sure your page’s landmark elements and headings are accessible.
Here’s what to review the Structure tab for:
- Landmark elements are used correctly.
- There are basic landmark elements like header, main, and footer.
- Content is in the proper landmark. For example, navigation is in the header.
- All headings are used to describe the content below them. There aren’t headings being used as text.
- There’s only one heading one on the page (typically).
- There aren’t skipped headings. For example, going from heading 2 to heading 4.
- There aren’t empty headings. For example, headings with no content, or headings used to create spacing.
Check out our headings video, Check heading accessibility using the WAVE tool, for a demo.
Contrast tab

The Contrast tab helps you test and fix contrast issues on your website. It also has a Desaturate page tool, so you can see the page in grayscale. This helps you find instances where only color is used to convey information. For more on grayscale testing, see our article Grayscale testing: The missing step in color accessibility.
Remember, WAVE only finds contrast issues in text or icons styled with CSS. It won’t find issues with images or gradients. Learn more about contrast accessibility in our article, Accessibility contrast requirements explained.
How you can use the Contrast tab
Here’s how you can use the contrast tab:
- Scroll to the bottom of the Contrast tab and select a contrast error icon. This will populate the foreground and background color fields, tell you the contrast ratio, and whether the combination passes for normal text.
- Use the sliders to find a new color combination that will pass. The Contrast ratio will update in real-time.
- Select the color swatch under the hex code fields to open your browser’s color picker. Select any color on the web page to update the hex code. You can use this method to manually test colors in gradients or images.
Check out our video, Find and fix contrast issues with the WAVE extension for a demo.
PRO TIP: The best way to make using the extension easier is to become familiar with accessibility topics. You can do this over time with our monthly accessibility focus.
Use WAVE to help with manual accessibility testing
WAVE isn’t just an automated accessibility tool. Since it detects alerts, features, structure, order, and ARIA, it can also help guide you through manual accessibility testing.
Identify your manual testing sample
To use WAVE to help with manual testing, start with identifying your sample. When we talk about your sample, we simply mean choosing a handful of pages to test.
We suggest at least a four-page sample especially if it’s your first time doing a manual accessibility audit. Here’s why we suggest four pages:
- If you pick the right pages and include all accessibility result types, you can often fix up to about 80% of accessibility issues on your website.
- Manually testing four pages means you can go through the entire process of getting your sample, testing the pages, and then fixing some issues in as little as an hour.
To create your sample, choose at least these four pages:
- Homepage
- Prominent content page
- Prominent content page
- Random page
You’ll review every accessibility result on each of these pages, which includes errors, contrast errors, alerts, structure, features, and ARIA.
It’s important to review each error type because some of the issues are embedded in your website’s template, which means fixing it in the template fixes it on every single page with that template. This can get rid of 100s of issues with one fix and is how you can fix more issues with a smaller sample.
How to manually test your webpage with WAVE
Now that you know how to use the WAVE extension and get your four-page sample, you can use WAVE to start a manual accessibility audit.
While WAVE’s results and tabs help find several accessibility issues, a manual audit wouldn’t be complete without keyboard, resizing, and assistive technology (like screen reader) testing.
To do a manual audit guided by the WAVE extension, follow WebAIM’s Evaluation Guide or watch the video demo below.
Learn more about using the WAVE extension:
Key takeaways
- To install the extension, visit WebAIM’s WAVE browser extension webpage and choose the browser you’ll be using.
- The WAVE extension has 5 tabs.
- Details tab – Summary of accessibility results, an automated AIM score, and a list of every accessibility result on the page.
- Reference tab – Learn what the results are and how to fix them.
- Order tab – Check your page’s navigation order and navigable elements’ accessible names.
- Structure tab – Check your page’s landmark elements and headings are accessible.
- Contrast tab – Test and fix contrast issues.
- Manually test at least these four pages:
- Homepage
- 2 Prominent content pages
- 1 Random page
- To do a manual audit guided by the WAVE extension, follow WebAIM’s Evaluation Guide.
- There are specific results content writers and developers can focus on when using the WAVE extension.
- WAVE extension results for content writers
- WAVE extension results for developers
