In this article, learn what the different admin settings are and how to navigate to admin settings, enable current and new courses, and complete a full sync on single and multiple courses to fix issues.
Navigate to admin settings
If you’re a Canvas Admin, navigate to Pope Tech’s accessibility admin settings by following these steps:
- In Canvas’s Global Navigation, select Admin, and then the account.
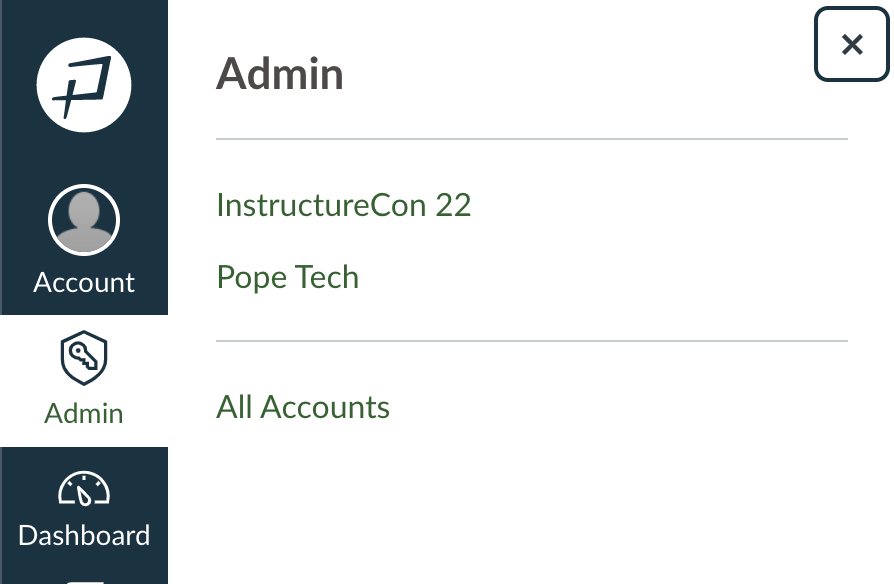
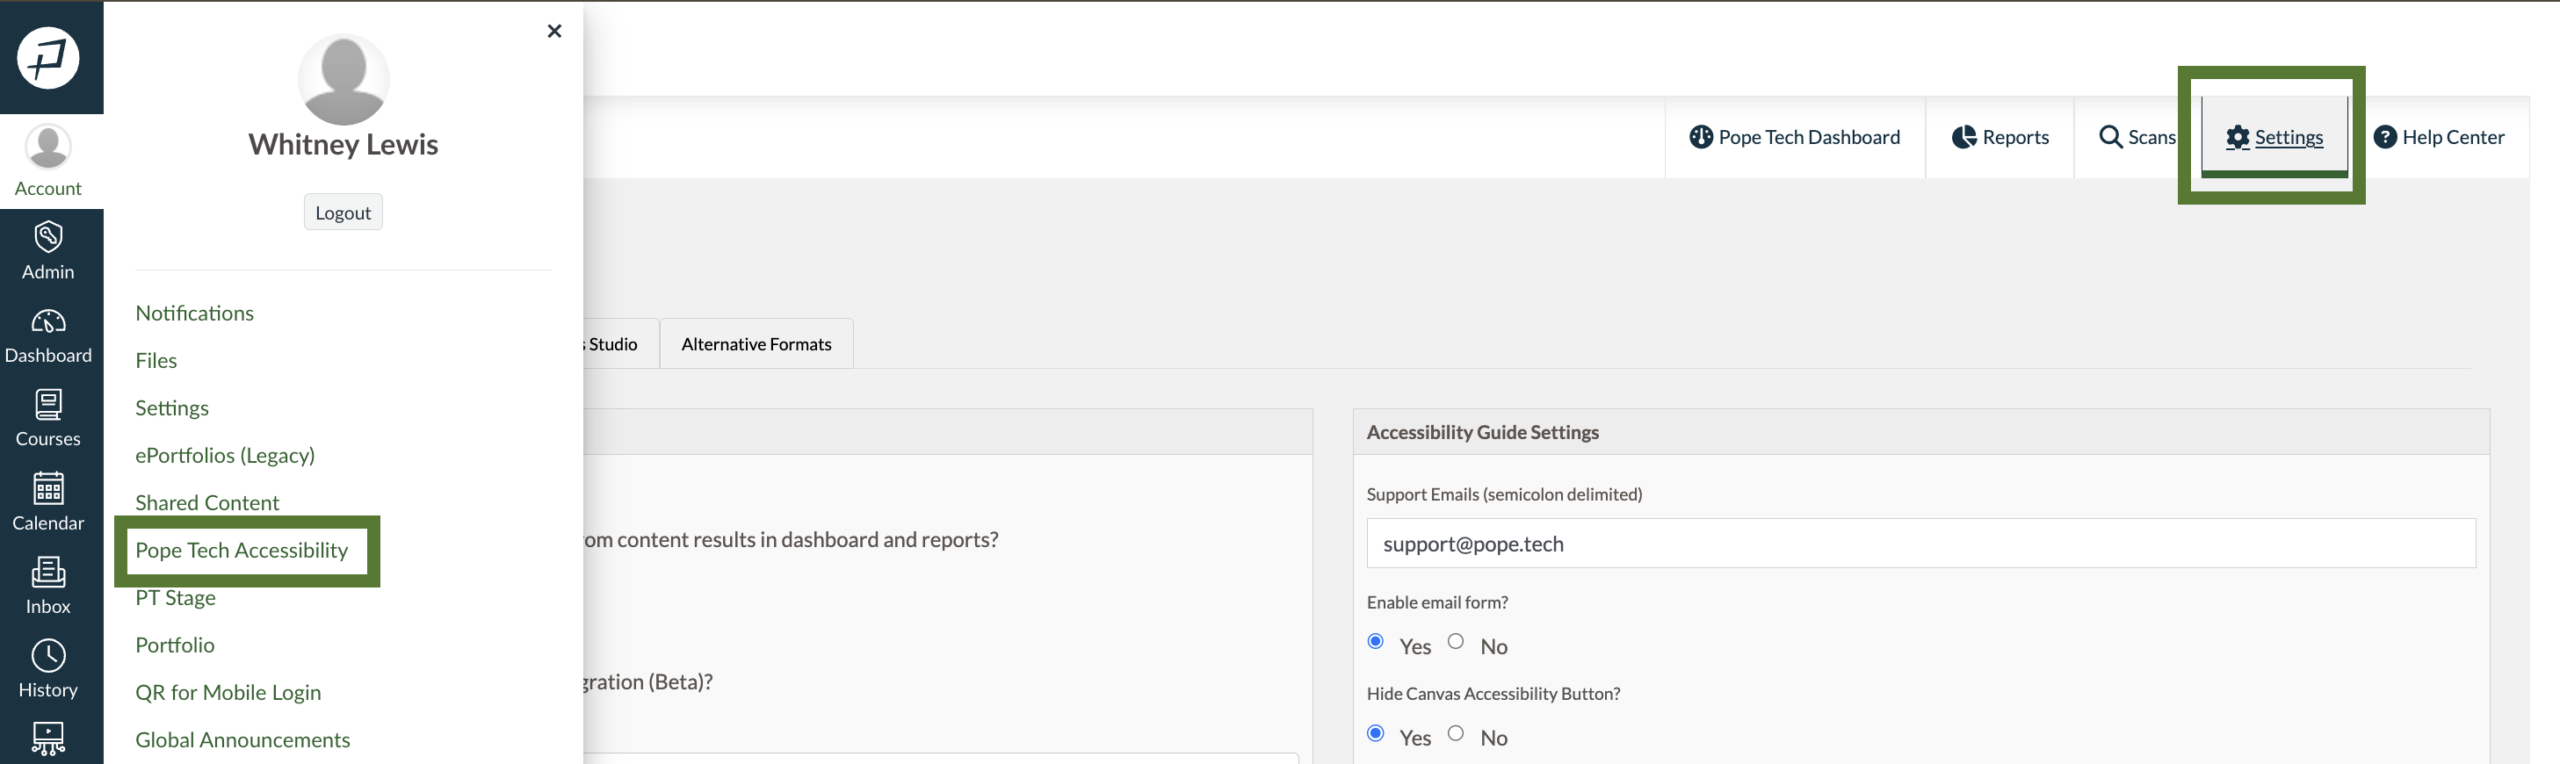
- In the Admin Navigation Menu, select Pope Tech Accessibility.
- In Pope Tech’s top navigation, select Settings.
Settings
The Settings tab has Dashboard and Accessibility Guide settings. Below is an explanation of each of the options for these. After saving your settings, log out and back in for the changes to show.
Dashboard Settings

- Automatically enable new courses? – Selecting this means all newly added courses will automatically be enabled, or synced and scanned. It also means existing courses that are edited are automatically synced and scanned.
- Separate document and video results from content results in dashboard and reports? – Selecting this removes document and video results from reports and everywhere in the dashboard except the documents widget.
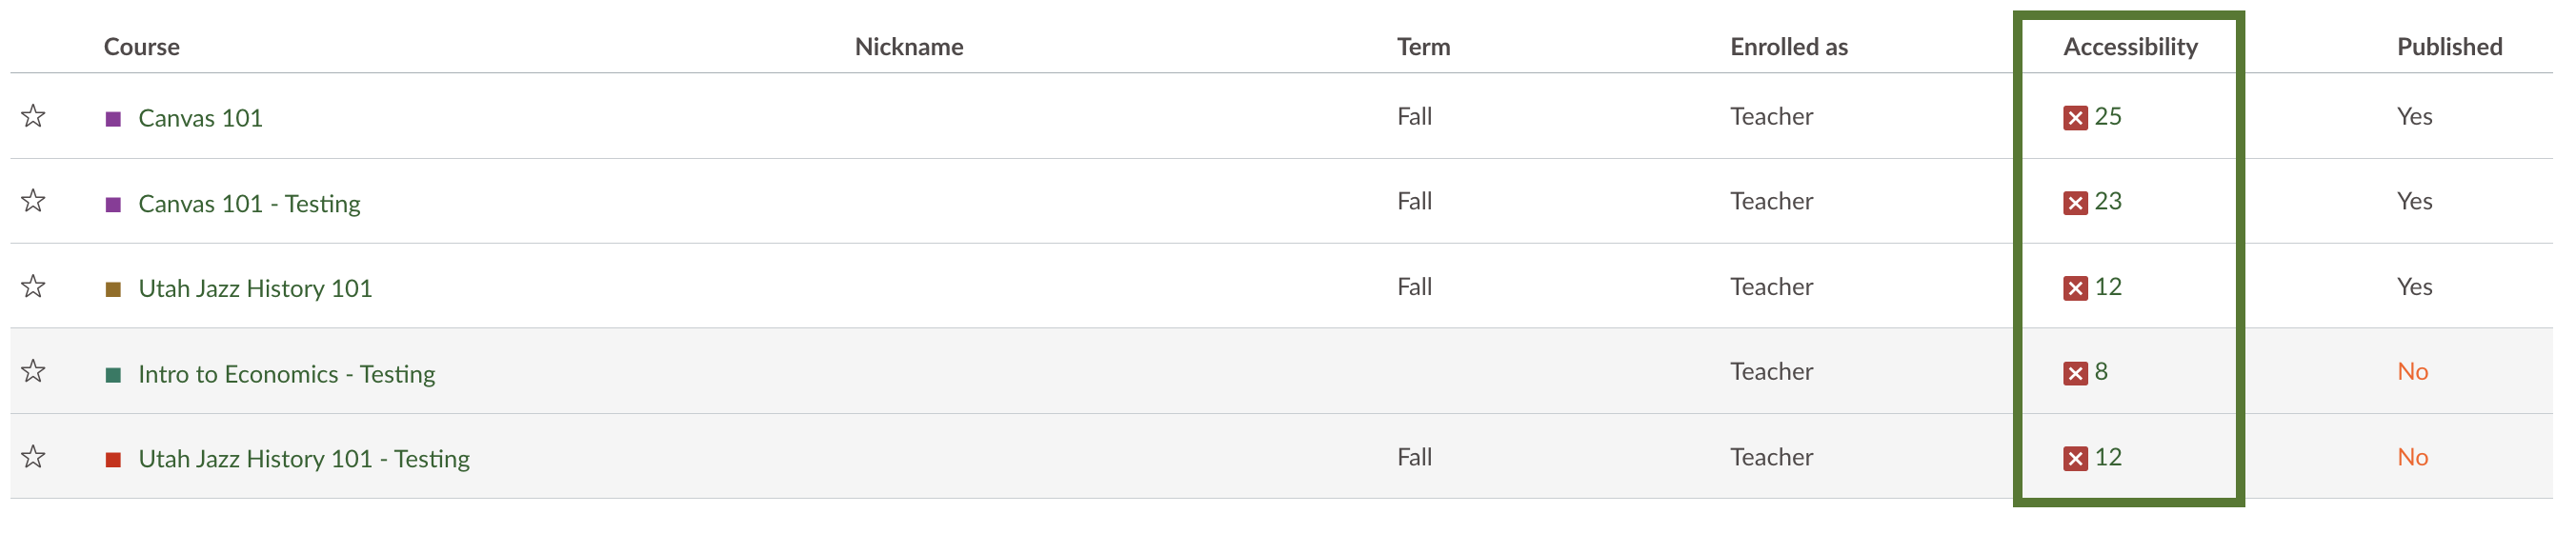
- Enable accessibility column? – Selecting this adds an accessibility column to instructors’ course and page lists. The accessibility column reports the number of accessibility issues.
- Allow instructors to enable courses? – If a course hasn’t been enabled yet, the instructor can’t access their course accessibility data. Selecting this lets the instructor enable their course so it’s scanned, and they can review their accessibility data.
- Enable dismissed results? – Turning this on lets anyone dismiss accessibility results. Learn more in Dismiss Results in Canvas.
- Enable YouTube caption detection integration? – Selecting this means you’ll see new results for YouTube videos. These include YouTube automated captions, YouTube captions, YouTube video missing captions, and YouTube video not found.
- Default Dashboard Term – Selecting a default term filters the Admin dashboard and My dashboard to that term. Users can adjust the term in their dashboards using the term filter.
Accessibility Guide Settings
After saving your settings, log out and back in for the changes to show.
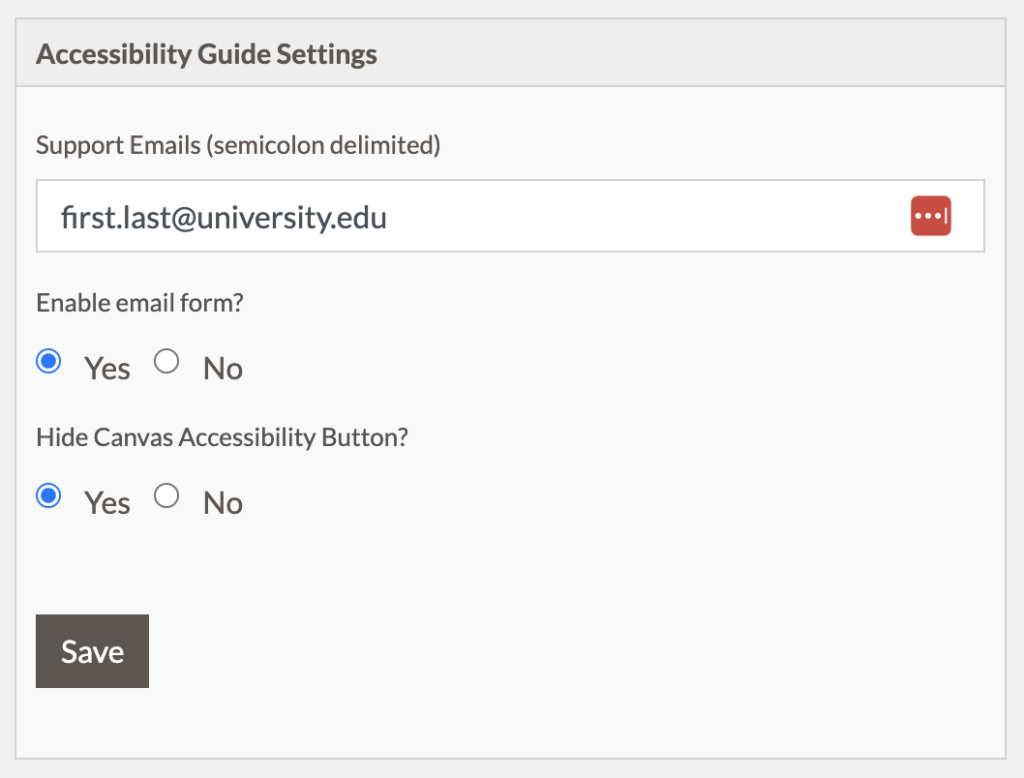
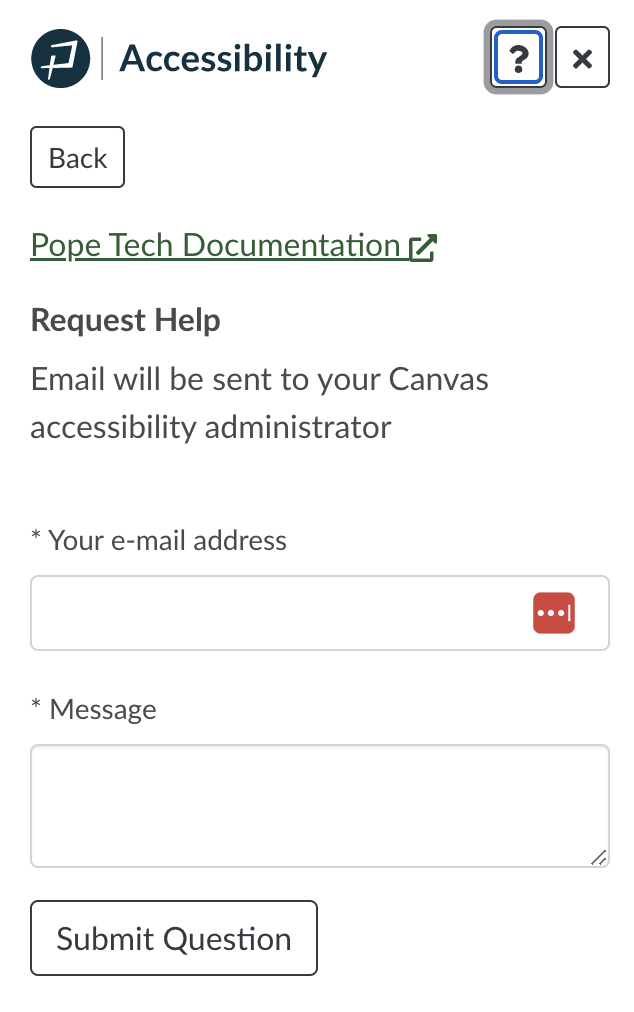
- Support Emails and Enable email form? – Selecting Yes for Enable email form turns on a form in the Accessibility Guide that users can submit for help. The Support Emails field is the email(s) submissions go to. For example, if I have Yes selected for Enable email form submission and the Support Email is sherri.bluff@university.edu, the user can access the email form when they select the Help icon in the Accessibility Guide. The email goes to sherri.bluff@university.edu.
- Hide Canvas Accessibility Button? – Selecting Yes hides Canvas’s built-in accessibility checker option.
Courses
In the Courses tab, you’ll enable courses and can perform a full sync.
What enabling courses means
Data shows in the dashboard once course(s) are enabled.
Changing a course from disabled to enabled means:
- The course is scanned and continues to be scanned every time it’s updated.
- Instructors have the Pope Tech Accessibility item in their course navigation and that course is included in their instructor dashboards.
If the course is already enabled, enabling it again won’t do anything. The course should be scanned whenever it’s updated. If you’re trying to rescan because of an issue, scroll down to Full Sync below.
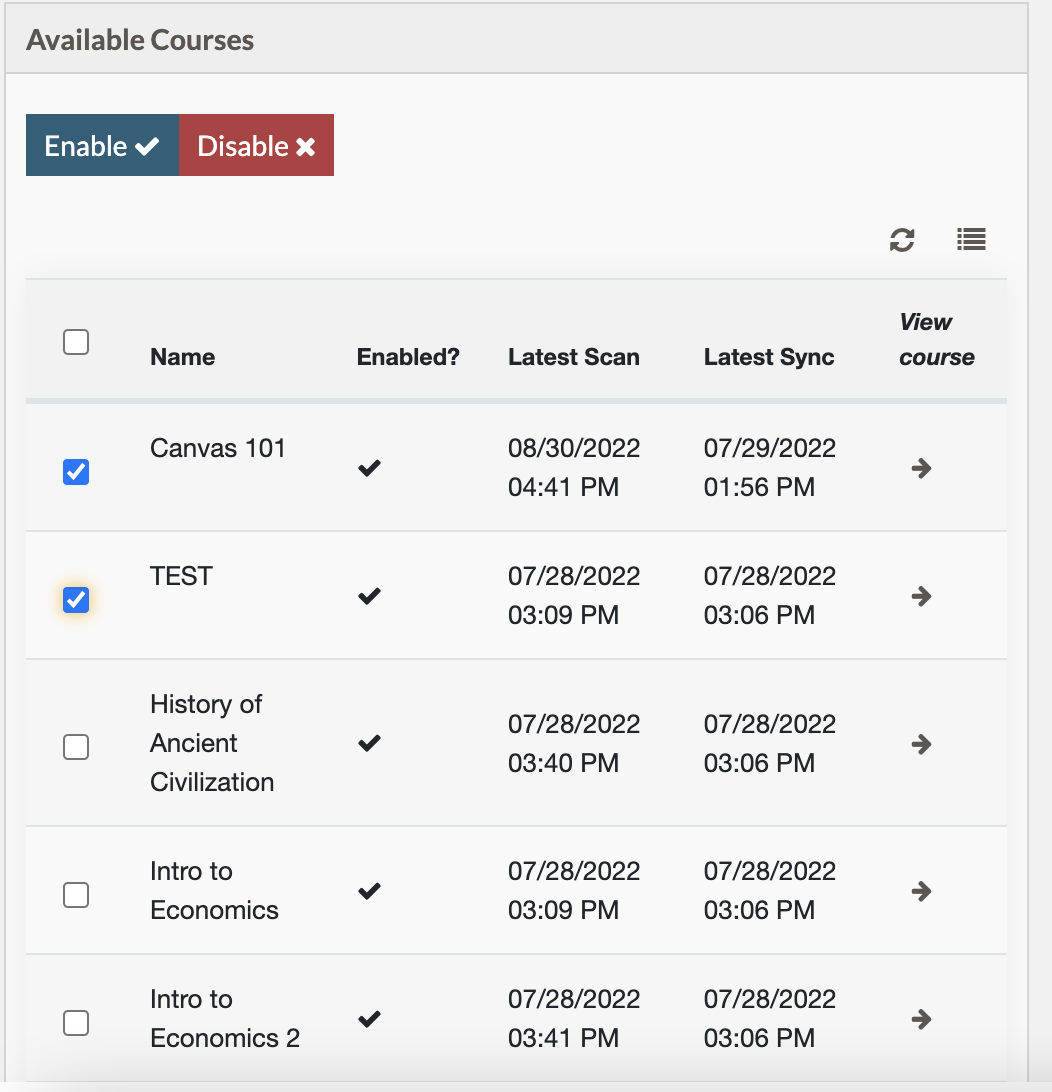
Enable current courses
To enable a current course, follow these steps:
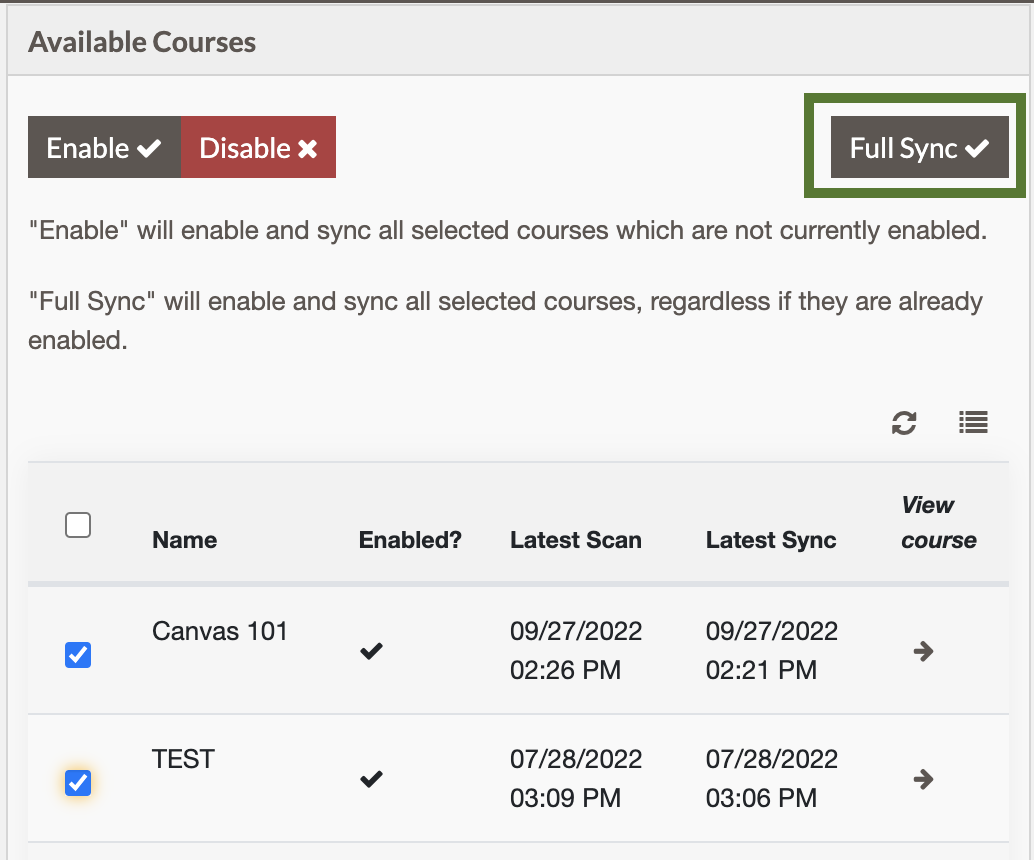
- Use the Available Courses widget to find the courses you want to enable.

- Select the checkmark by the course or select the checkmark above the column to select all the courses.
- Select Enable.
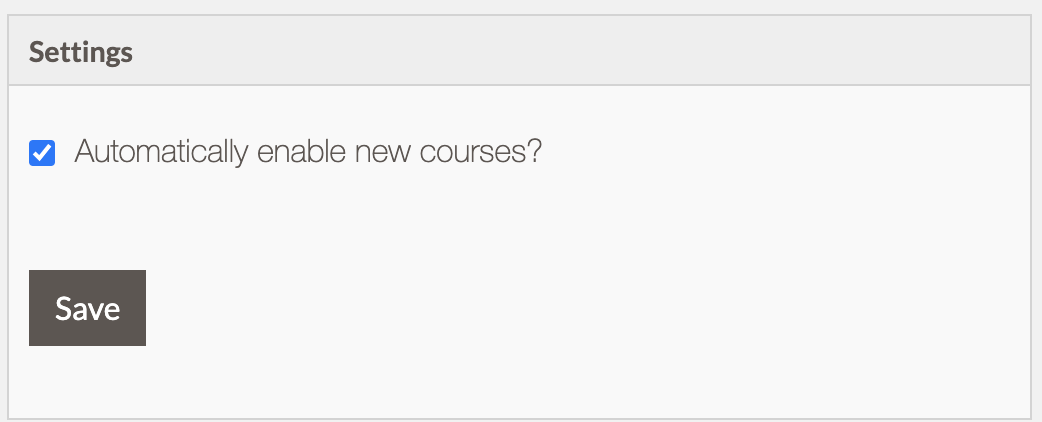
Enable all new courses
To automatically enable all new courses, select the Automatically enable new courses? checkbox in the Settings widget, and then select Save.
What Full Sync means
Full sync is similar to enabling a course because it also syncs and scans the course(s). The difference is if the course is already enabled, Full Sync still runs a sync and scan. Afterward, the course keeps being synced and scanned when there are updates.
A full sync is helpful in these situations:
- There is an error in the Latest Scan or Latest Sync columns.
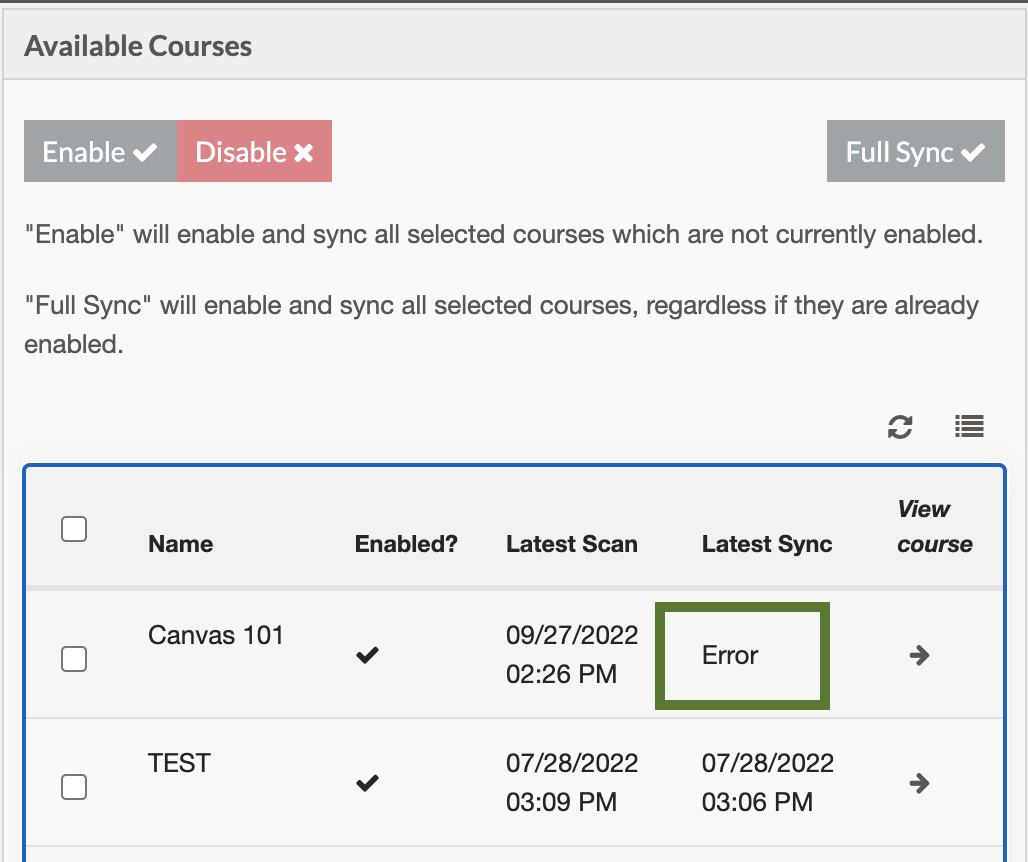
- You notice missing or incorrect data in the dashboard.
Full sync individual or several courses
To do a full sync to one or multiple courses, complete these steps:
- Use the Available Courses widget to find the courses you want to Full Sync.
- Select the checkmark by the course or select the checkmark above the column to select all the courses.
- Select Full Sync.
Full sync of all courses
Other scans won’t start until after the full sync is done. If you have a lot of courses, consider starting at the beginning of a weekend, so other scans aren’t disrupted.
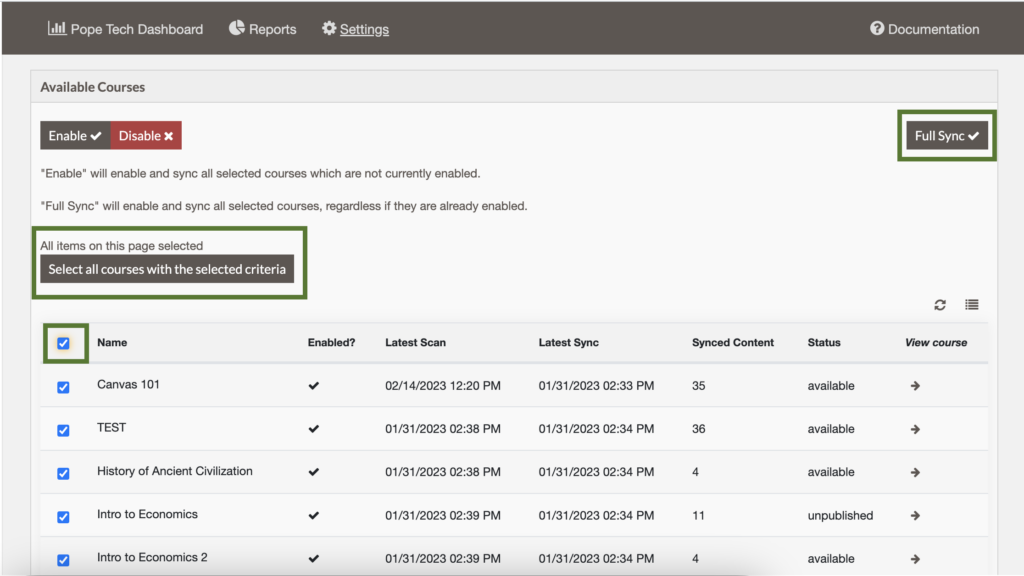
To do a full sync of all courses, follow these steps:
- Select the Select all rows checkbox in the Available Courses widget.
- Select the button Select all courses with the selected criteria.
- Select Full Sync.
Reports
Admins can create custom reports that show for users as an option in the HTML, PDF, or CSV Result Detail report. The custom reports are shown in the Configure Results > Presets drop-down.

Once on the Reports tab in Settings, select Add Preset to start building your custom report. You can search for and select all the results needed for that report. For example, selecting all results related to videos for a video report option.

Canvas Studio
Admins can set up a Canvas Studio Integration here. This makes it so Pope Tech scans Canvas Studio videos for captions. Learn how to Set up Canvas Studio video tracking in Pope Tech.
Related articles
- Use the Canvas Accessibility Admin Dashboard
- Export and email reports
- Use the Canvas Accessibility Instructor Dashboards
Looking for more? Here’s Pope Tech’s Canvas Documentation for the Accessibility Guide and Dashboards.